These instructions and screen images apply to Azure Active Directory. We will not be directly creating an 'Enterprise application' in AD since that method doesn't enable the OIDC option.
1) In Active Directory select App registrations
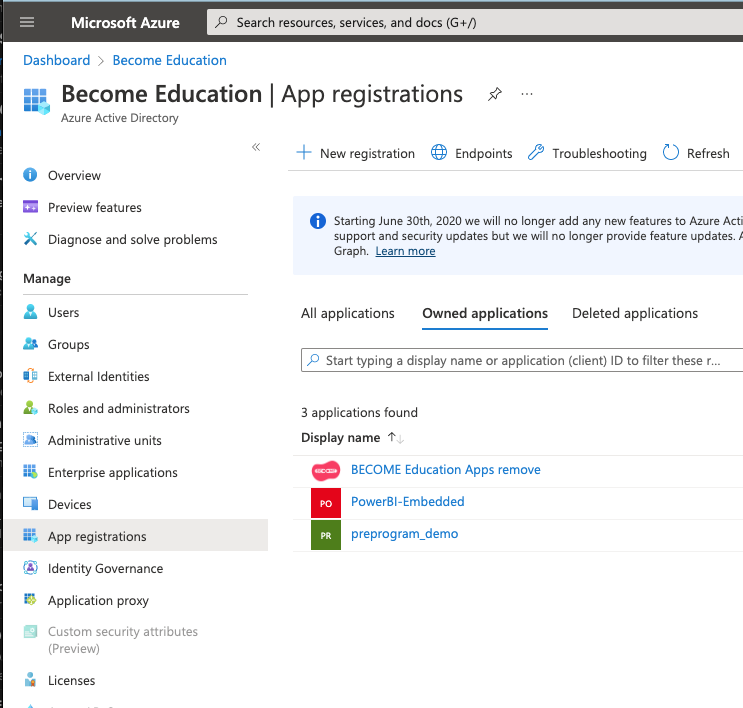
2) Click New registration at the top of the blade.
- On the app registration screen enter BECOME Education Apps as the Name.
- Select account type: Single tenant. If you are configuring for a school system that has schools in multiple AD directories, pick Multitenant without personal accounts).
- Select Web in the Redirect URI section and enter the URI for your region:
- Australia and New Zealand:
https://ause.login.become.me/b3m3identause.onmicrosoft.com/oauth2/authresp
and
https://ause.login.become.me/b3m3identausedev.onmicrosoft.com/oauth2/authresp
- Australia and New Zealand:
- Click the Register button
(Our legacy Redirect URI is shown in this screenshot. Please use the regional URI from above instead)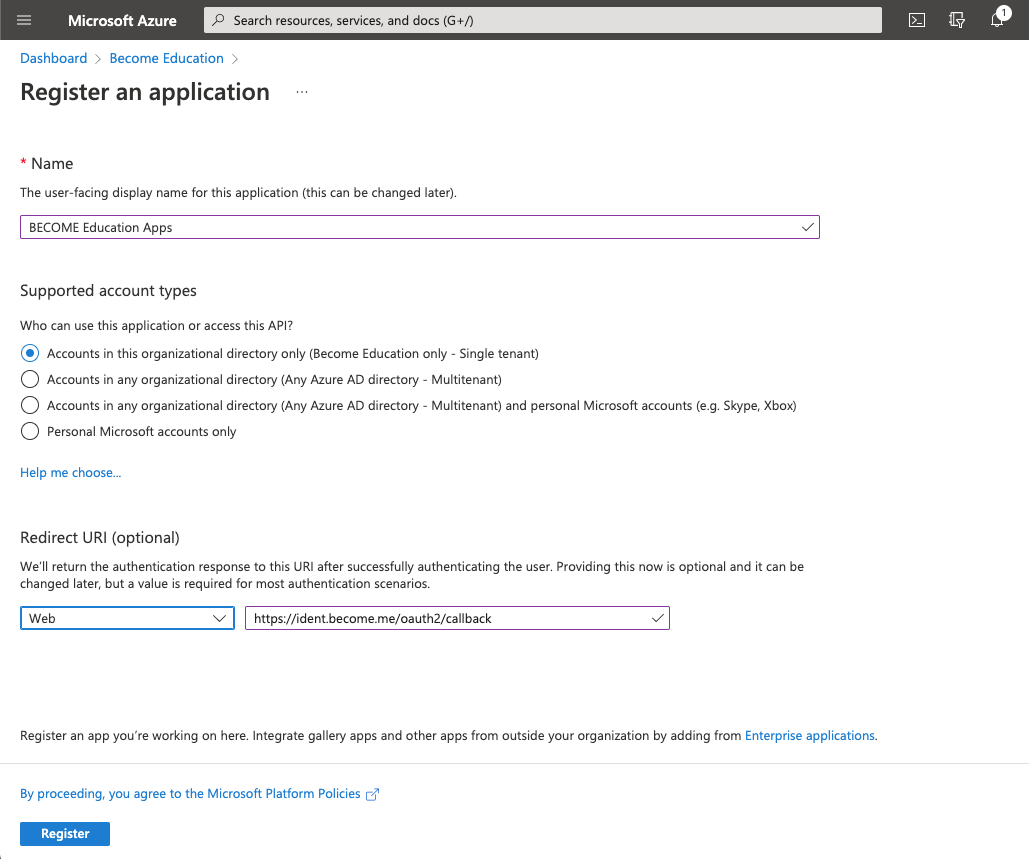
If you are configuring this during BECOME's June - July 2024 migration to Microsoft Entra, please add our legacy Redirect URI by opening BECOME Education Apps | Manage | Authentication. Add https://ident.become.me/oauth2/callback into the same section in which the regional URI now appears.
You will not need to remove the legacy URI after our migration.
3) Click Certificates & Secrets and then + New client secret.
- Type BECOME Education secret in the Description field
- Set Expires to 24 months (this is the maximum period supported)
- Click Add

4) Immediately copy the secret generated by Azure. We'll need this in the email you are sending.
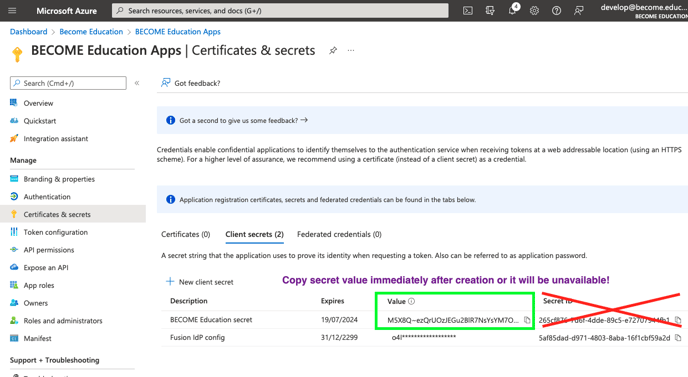
Record the value property of the BECOME Education Secret. This is the Client Secret that you need to provide to BECOME support.
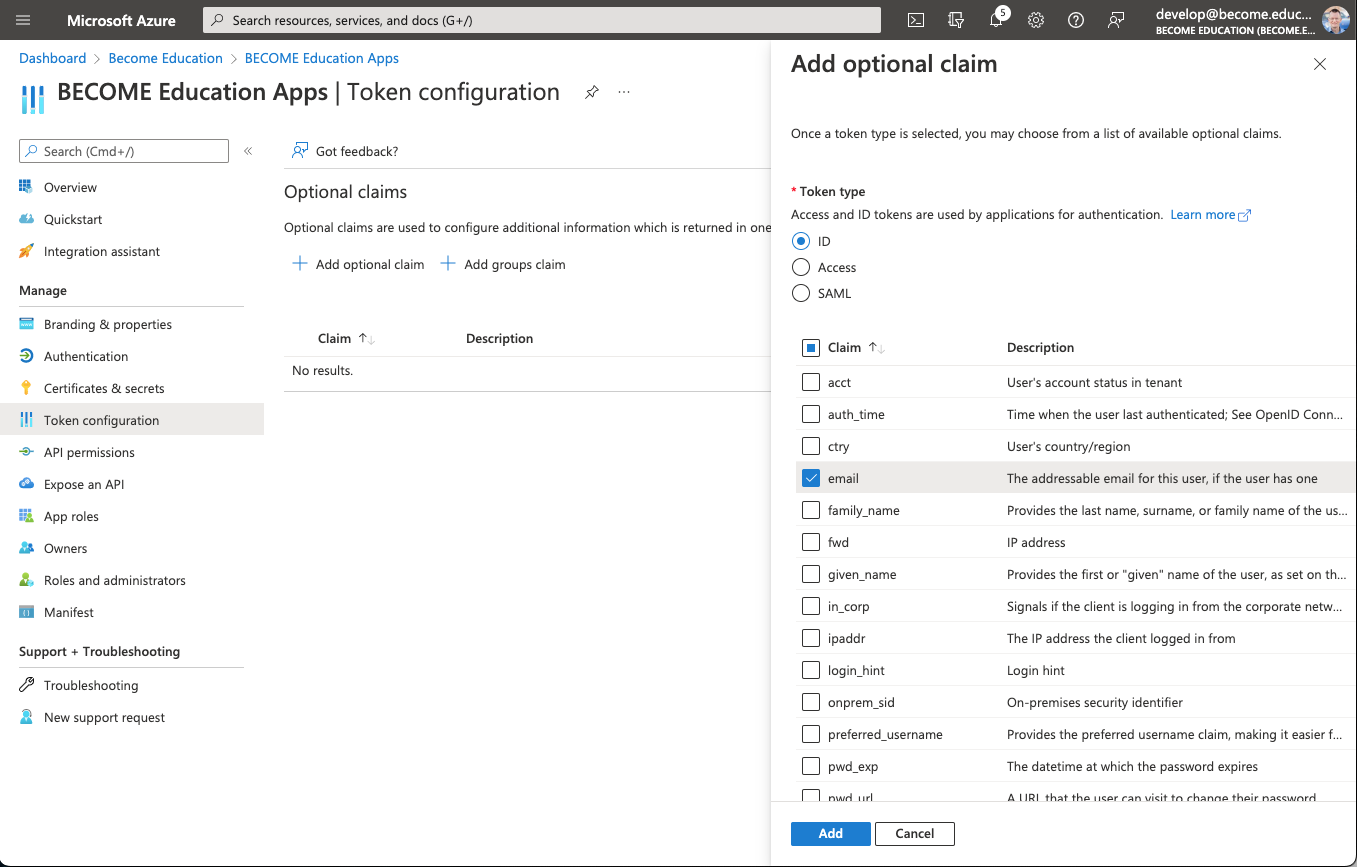
5) Click Token configuration then + Add optional claim
- Select Token Type of ID
- Tick the email option in the claim section
- Click the Add button
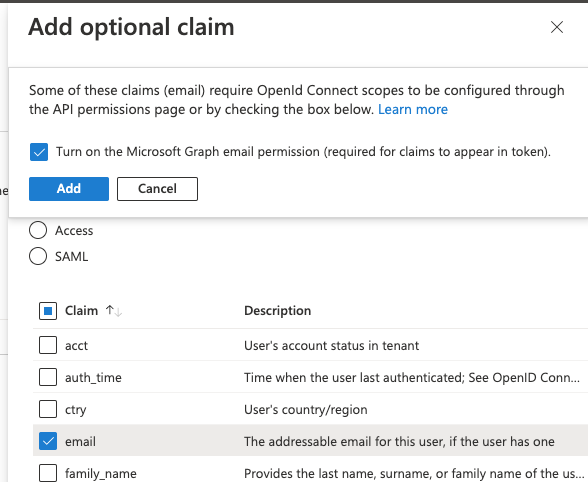
6) This message box will appear. Tick Turn on the Microsoft Graph email permissions and press Add as shown:
7) The Optional claims section should look like this now:

8) Below the Token configuration menu item on the left, select API permissions. If not shown, add permissions for Microsoft Graph email, and Microsoft Graph User.Read. Then Grant admin consent to both. The screen should now look something like this (special thanks to Emmanuel College QLD for the screenshot):

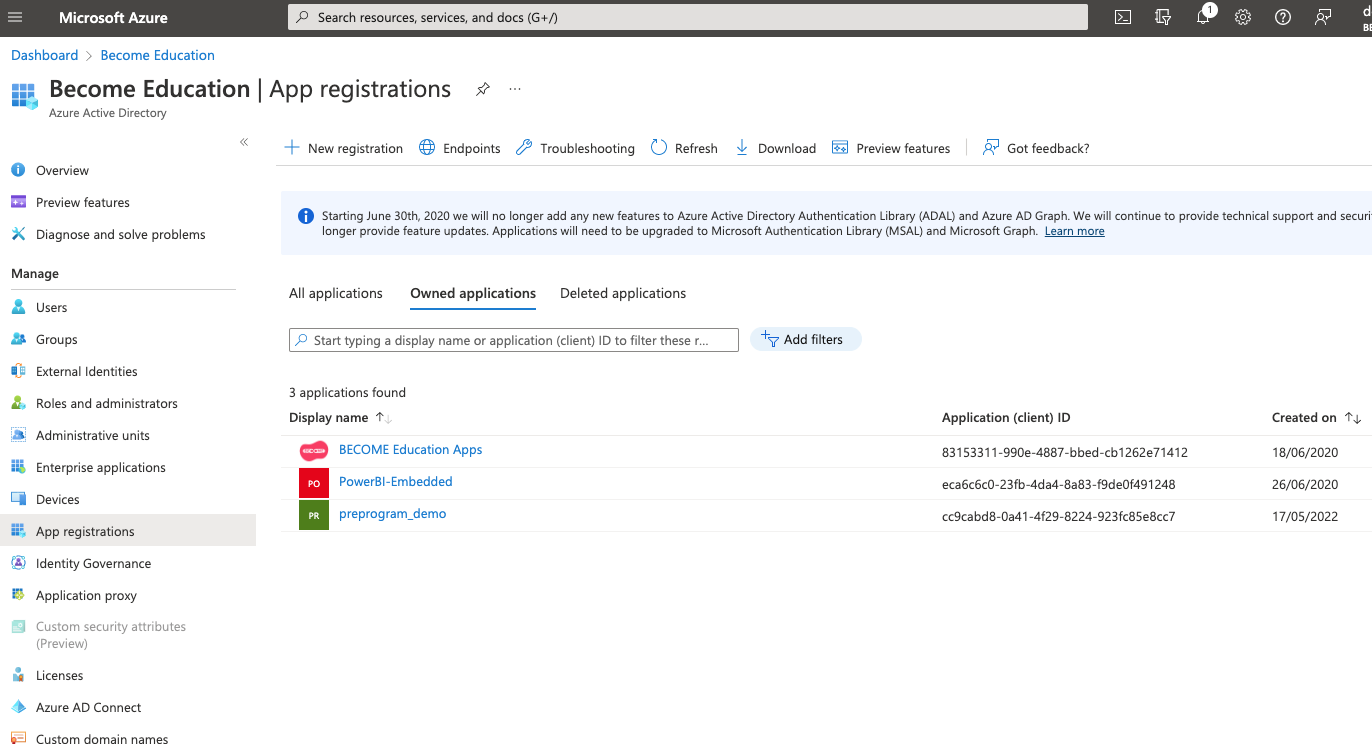
9) Return to the top level of Active Directory and click on App registrations in the left panel. You should see BECOME Education Apps in the app list.
Record the Application (client) ID value for BECOME Education Apps
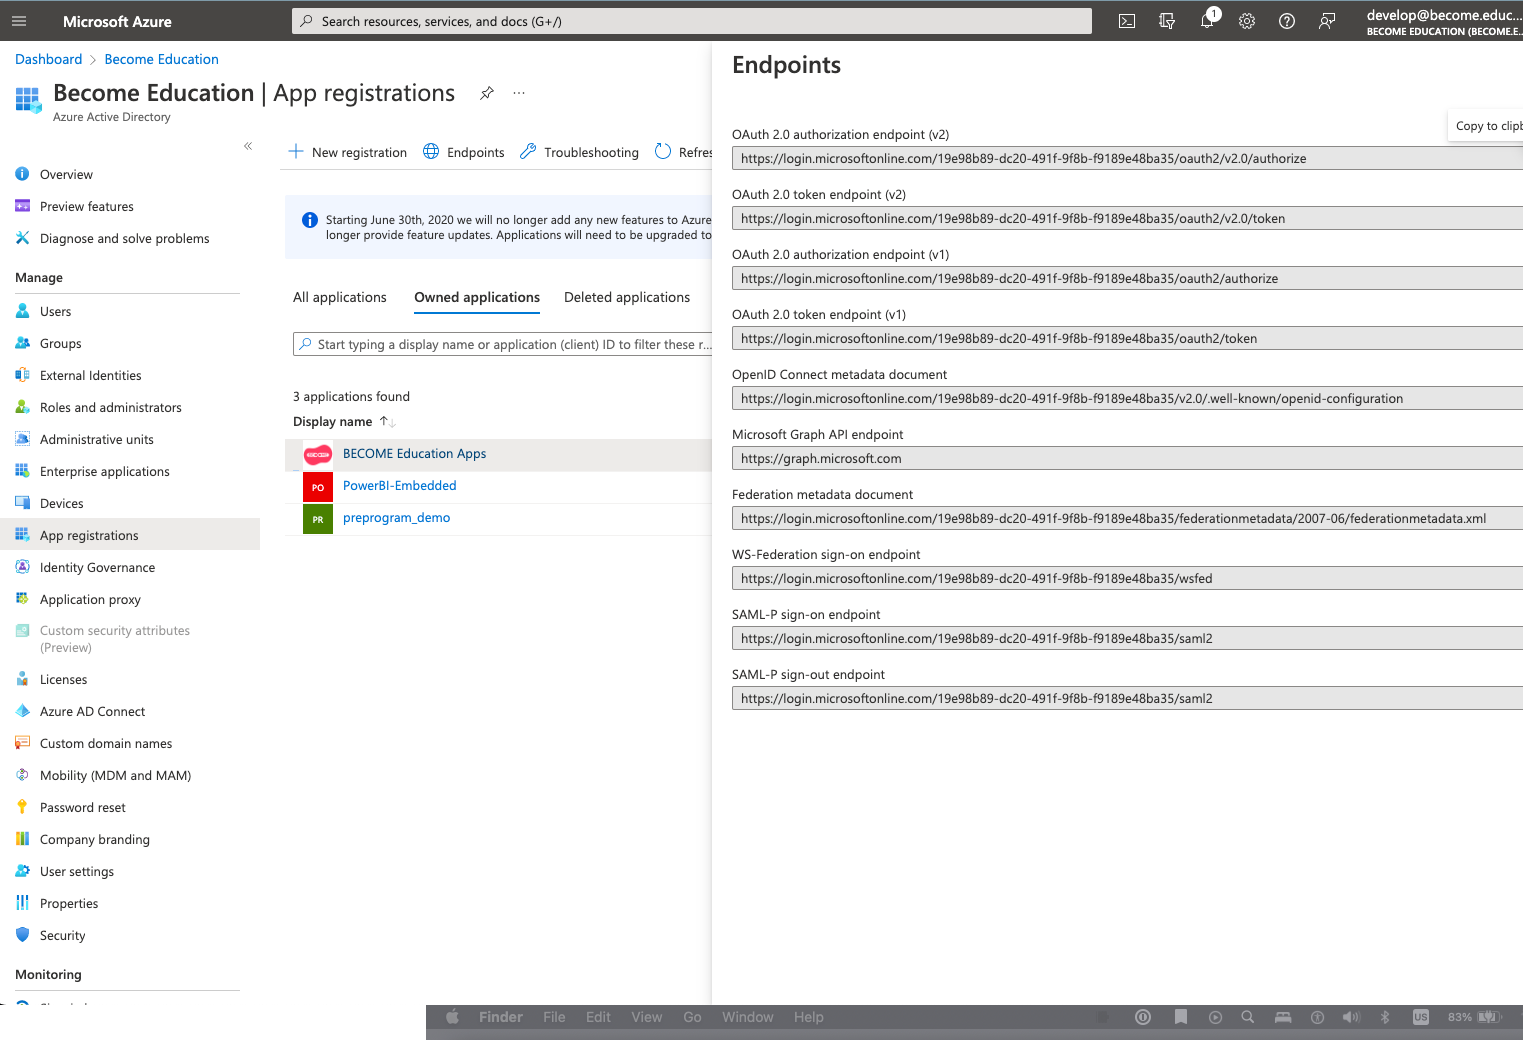
10) Click the Endpoints icon at the top of the App registrations blade
Record the OpenID Connect metadata document address
11) Create an email to support@become.education. Please provide your contact details, school, and the following details:
- Application (client) ID
- Client Secret value
- URL for endpoint discovery / metadata document.
- Email accounts we'll use as basis for new accounts on our system:
- your normal SSO email
- your Azure AD admin email
- student test account (or actual). Ideally with password if possible. This will be used by us, or you, to test the SSO login flow.
12) Send the email to Support.
- We will configure our system and create the test and admin accounts for you.
13) When we respond to your email confirming setup, connect to each of our apps and attempt to login.
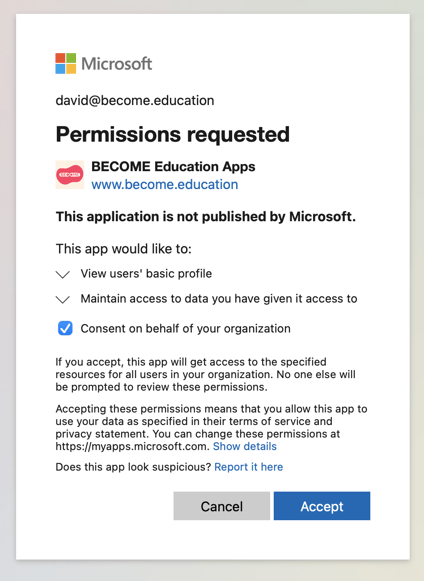
- If you didn't accomplish Step 8 above, you'll need to consent to the permissions request for your organisation. This will be best accomplished by asking us to add your Azure AD admin email account to our system (as a staff member). When you connect to our apps as that user it should then be possible to consent on behalf of your org.